Ref 858; Painting with light ---- "The importance of the values"
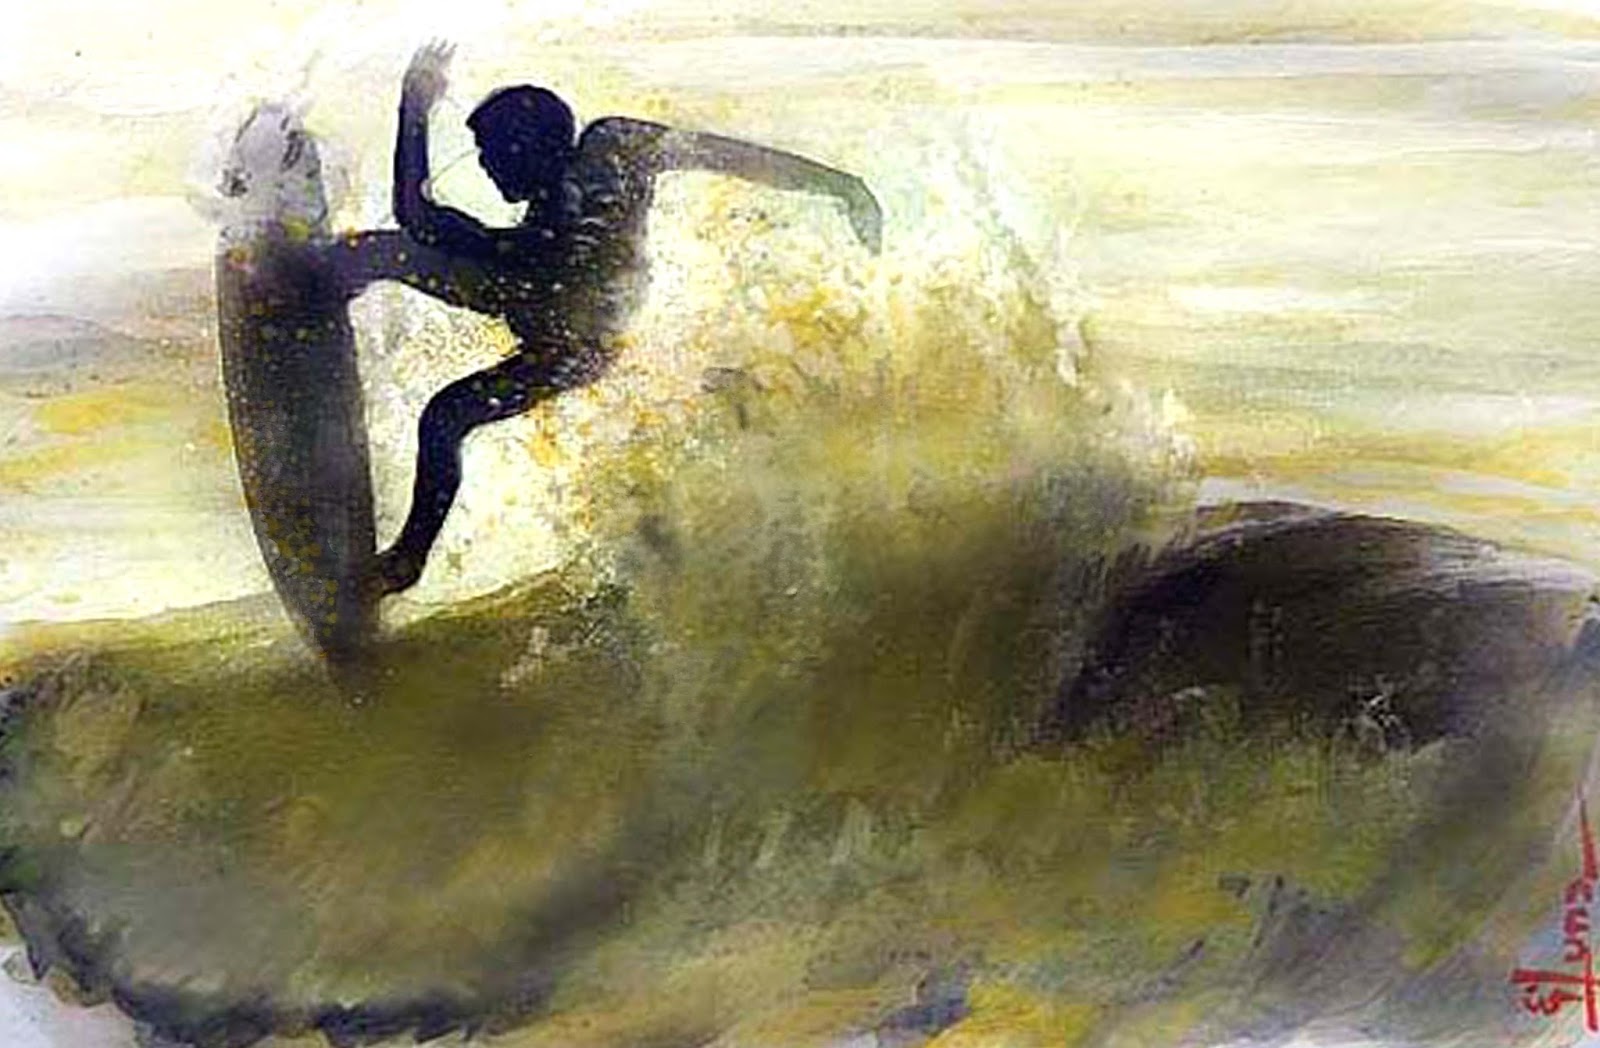
Every painting has a range of values; darks, lights and middle tones, and value is the first way to express light in paintings, but I like to use exaggerations within this system, and explore the ways the light affects everything else after determine the light source you can start, the values on the contrary side disappearing into the mist, that´s way I lift painting with a toothbrush or a paper napkin and additionally I added more white paint above or through out the Sharp dark lines until be satisfied (over cold press paper)
Ref 858.- Be happy, be bright, be you
It is a blog, about oil, acrylic, watercolor paintings through out several technics to improve and learn in a weekly base.- I am a person who loves art - I'm having a good time, working this blog, to keep learning, sharing and looking how to enhance the relationship of value and balance of color for my work. Art is primarily a state of the soul is not a thing, it is a way
martes, 30 de junio de 2015
Ref 857 Rose Petals
Colour is divided into 3 PRIMARIES which are RED, YELLOW AND BLUE
By mixing these primaries , the SECONDARIES are produced - GREEN, ORANGE AND PURPLE
I use to put primaries first to have the cleanest color
However, in practice it is not possible to obtain perfect primary colours and so it is useful to work with modified primary colours - one each side of the perfect primary on the colour wheel.
Therefore, the perfect red is replaced by two reds - a purpley red and an orangy red, I worked with the first blend toward the shadow zone
So from this, it can be seen that : -
1. the cleanest colour is obtained by mixing the two colours closest together on the colour wheel.
2. by adding the complementary colour , i.e. the third primary colour the mix can be grayed back.
3. warm colours produce warm mixes.
Each petal needs to be worked alone and while is drying you can work in another separete from it
I do not use brush.- just in the edge and then I tilt the paint to go downwards by itself and raising painting with a knife at the bottom, please if something wrong do not try to fix until become dry, otherwise the petals won´t work at all as i did by mistake in the left side of my painting over cold press paper
Ref 857
domingo, 28 de junio de 2015
Ref 855 Painting with syringe and dropping painting
The wave and some areas were made with a syringe with two
base colors; medium yellow and gray payne, preserving white tones with masking, with the
technique of pouring paint and the help of the sponge brush and spray bottle
to spread it accordingly
sábado, 27 de junio de 2015
sábado, 20 de junio de 2015
I created several paintings for over a year and a half ago, without so much comments, ---I made this space-blog as a journal with notes trying to get comments back and forth, but I think it has not been worth it then, so I think I will try this blog as a single personnel file from now on, with only consecutive paintings as a diary
Ref.845
ref 846
ref 847
Ref.845
ref 846
ref 847
martes, 9 de junio de 2015
jueves, 4 de junio de 2015
Watercolor, spatule and Molding Paste
Molding Paste; is a thickening gel that increases the body of the paint, reducing its flow. Mix molding paste with the paint or use it pure by applying it in several layers with a spatula on the surface of the paper prior to painting.
Texture medium contains fine particles that add texture to the watercolor. It can be applied directly onto the paper or mixed with watercolors first.
I use molding paste on occasion to add texture to paintings. On the ref painting 342, I used it to mold the rocks on the cliff and for the pure sky colors. This added emphasis to the paintings. Here is how I do it
- Prepare paper 140 lbs coarse side with some prior humidity and before dry it.
- Apply a light molding paste blend it with any watercolor (I use Light Molding Paste) with a palette knife, or any other preferred tool, to the areas of the paper you wish to have textured.
- Allow to dry thoroughly.
- Paint with additional watercolors as you normally would. Paint right over the molding paste and fade with sponge, paper, napkins add or take away wáter as you require to complete the idea
- When complete, spray with a fixative
Ref 841 In the nature, light is the color in the canvas color is light
A woderful sunset a nice music and my best regards for you
miércoles, 3 de junio de 2015
Watercolor.- Pencil and brush with watercolor
Watercolor pencils look the same as regular colored pencils and can be used the same way. The magic happens when water is added, transforming the pencils and causing them to behave like watercolor painting.- Here are a few ideas and techniques you can try with this exciting and versatile médium
Technique #1: Color your drawing by layering colors, and then paint over the area with a brush and plain wáter.
The first thing to consider when using watercolor pencils is that colors will look different after water is added. It’s generally a good idea to make a chart on a piece of watercolor paper to see how the colors will look once wet, as the water will usually make the colors appear much darker and more vibrant.
A variation on this technique is to spray water instead of brushing it after your drawing is complete
Use the pencils dry to add details on a watercolor painting.
Technique #2 Watercolor pencils can be used on top of a watercolor painting to add designs and fine details. I find this technique really useful when painting cityscapes, for example, to create very fine lines like electric wires or buildings details.
You can use the watercolor pencils dry or dip them in water before drawing to make a darker bolder line. Or, you could even try drawing with the pencils on wet paper, which will produce a soft line
I did my following painting first background and raven underpainting with brush,
I added details with technique 2 with pencils previously dip in wáter, paper always semi wet regarding the eye first dry pencil and then wet technique 1
Ref 840 A painting is not a picture of an experience, but is the experience
Suscribirse a:
Entradas (Atom)