Main steps below the painting result of this process
1st step.- I cut a piece of canvas over cardboard "21x26 cm and taped a frame of 2 cm all around
2nd step.- I start to sketch the main form with a pen (it is better to use a pen instead a pencil, in order to be able to see main features once molding paste be applied above )
´The main features are now completed in pen, above the canvas
3rd Step, What you need now is molding paste, and old flat brush and spatulas several sizes
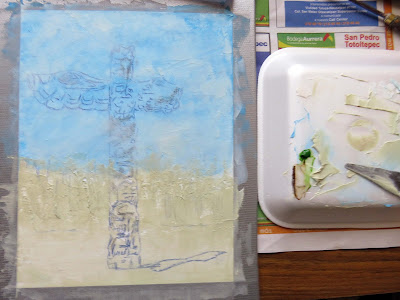
I start with background so I mix cerulean blue with modeling paste and apply with a spatula, as you can see the small thickness let us see the tótem lines underneath Note .- when apply you can add just simple modeling paste "White color" to make different tones as in the sky (clouds) once completed apply additional wáter with your fingers to make a smooth surface
Folowing the background now I mixed a dab of Green and raw umber with modeling paste for this área I do not add additional wáter instead I´m making texture with the spatula for the far tres
4th step.- Into the tótem área I start to build up more thickness with modeling paste + raw umber + a dab of burnt umber, trying to follow the different contourns with a small spatula
As I´m trying to build up more thickness the feature main lines are not so easily visibles into the tótem
5th step.- So I have the chance to redefine the features over it, I did use this time Brown gel ink and build up again more modeling paste as it dries, reinforcing the lines
Once completely dry this will be my underpainting to work with
6st Step.- Now with watercoloring and brush start to define main shadows and from there ligth color details
Through all the stages you can add more modeling paste to sculpt the figure as much as you want - to give the 3D appearance and paint again over it
This is the result after taking the masking tape off,
And the painting itself
hope you like this sculp-painting art method


No hay comentarios.:
Publicar un comentario