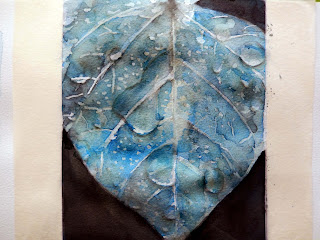
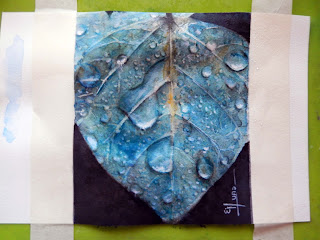
This is the final result of this process; (ref. photograph)
Stage 1 Preparation;
Cold press paper 190 gr
Watercolor.- Turquoise; Ivory Black; Ochre; White; Vandyke Brown
Gouache.- Permanent White
Brushes No 1,2,6,7 round sable
old bristle brush for lifting paint
Other materials.- clutch pencil B; Tissues; Kitchen roll, Brown Gummed tape
Masking fluid
Stage 2.- Composition;
Pencil guidance,
Stage 3.- First wash & masking
As I want my leaf to pop up from the paper I decided a dark background
I used same color of the leaf (turquoise - but mixed with ivory black )
I did not worry to much about even coverage, this is the first of several washes
Note it is better to use neutral tint mixed with turquoise, because results shown better transparencies into the dark background
Stage 4.- Second wash
After first has been dried I painted another wet wash of same mix and in the leave continue adding masking after some pale color added to avoid whites too bright at the end (Tip. into the small drops the masking is the trick, I added with a toothpick traying to gain high in some way against the paper surface)
Stage 5.- I starting lying down washes on the leaves, using predominantly turquoise and being careful to leave áreas of White paper for highlights to shine through, then I applied the final background wash, increasing the amount of pigment, (Tip I use gravity for paint my leave, in order color goes downwards the masking Works as a barrier for this painting wash going around the small dots)
Stage 6 Wait for dry and turn around 180 degrees and again pour color paint but now more concentrated because the color needs to have a gradient of intensity base for the dew drops, The masking is doing its job as color protection but also as barriers to define small dew drops at the end
I repeated this process twice until be satisfied with colors
Stage 7 Dewdrops and veins.- loosening áreas with a wet brush and lifting the color with tissues, I began to depict drops and veins (main veins are still masked) I added some dark color for shadows of big drops blending with wáter into the lighter áreas, and a darker mix underneath the dewdrops
Additional tip,.- Just after add color paint if you add with care a drop of alcohol the effect for the bid drops looks in some way more natural and integrated and do not forget to tilt the paper accordingly so the gravity also Works for you
Stage 8 highlights at first I use transparent White, but the real whites needs to be with gouache "permanent White" as you advance to reinforce it, I did by working each section of the leaf until be satisfied,
Stage 9 Final touchs.- you need to work in each of those drops so I took away the masking but I left some of them, if the appearance looks well and again hihlight first the selective required shadows with same turquoise color and again with just White (gouache) highlight accordingly
Stage 10 Once the painting was completed I increase the intensity of some shadows with additional glazes ochre and turquoise and with some tissues at hand


No hay comentarios.:
Publicar un comentario